Tuesday, 30 July 2013

Foiling The Fruit Fly


Fruit flies are on the move, spreading into new areas and destroying backyard fruit crops. The damage these little flies cause has to be seen to be believed. Anyone with fruit trees in their garden needs to give some thought now to how they intend to control this devastating pest.

If you or your neighbours had this problem last year, be prepared for a repeat of the same, unless you take measures to prevent it.


I’ll give you a choice of several strategies you can use to prevent infestation this year. There a number of baits and traps commercially available. Last year, after having to sacrifice almost the whole fruit crop after fruit flies infested my peaches and plums, I bought a trap called Cera Trap. This consists of jars containing a liquid that attracts and kills both Queensland and Mediterranean fruit flies. With several of these hung around the garden, there was very little infestation in the summer tomato crop. Those tomatoes in which there were larvae developing were solarised, as above.

This year, I have the traps ready to hang as soon as new fruit begins to form, which will be very soon as I have peach and nectarine trees in blossom right now. With luck, and cooperative neighbours, I’ll prevent a recurrence of last year’s disaster. I bought these traps through an organic gardening mail order company called Green Harvest. They also sell exclusion bags to cover the fruit and another bait product, which works similarly to the Yates product described below (www.greenharvest.com.au or ph: 1800-681-014). I know there are people who are happy to use the exclusion bags, and covering the fruit this way would probably keep the pests off (you have to be careful not to leave any gap for the flies to enter). However, to me they seem like a lot of fiddle, and what happens with the fruit you can’t reach to put the covers on?


Yates Nature’s Way Fruit Fly Control has the advantage of being readily available. You can probably get it at most garden supply shops. It is made from spinosad and a protein and sugar-based bait. Spinosad is an insecticide made from naturally occurring beneficial soil bacteria; this kills the fruit flies after they have been attracted by the bait, which the flies can detect from several metres away. This product is applied to the trunk and lower foliage of the trees.

When using a product such as that described above, you need to put out several traps around the fruit trees NOW, to monitor for the presence of the flies and know when to apply the bait/insecticide. There are numerous homemade traps and baits, I’ll only give the bait recipe suggested on the Yates website: 1 litre water, 1 cup brown sugar, 1 tablespoon yeast, 1 tablespoon Vegemite, ½ cup cloudy ammonia. Combine well and put a small amount into a several plastic bottles hung from the fruit trees. The bottles need to have small holes or a flap to allow the flies to enter.

Both methods described are suitable for use in organic gardens.

Garden hygiene is paramount throughout the spring and summer. During and at the end of the fruit harvest each year remove all fallen and mummified fruit and solarise it or dispose of it in the rubbish bin, not the compost. To solarise infected fruits, or weeds for that matter, place them in a sturdy black plastic bag and leave it in the sun for up to six weeks (during the summer). By this time any pests will be cooked and the rotten fruit can safely be added to the compost. Do not use the biodegradable bags as these will break down when exposed to sunshine for lengthy periods and you will end up with a mess of small bits of plastic and rotten fruit.  

Alternatively, if you have poultry, feed them the infected fruit, just make sure it is all eaten.

As a general aid to control of fruit flies and numerous other pests, plant trees and shrubs to attract insect-eating birds, keep soil and plants healthy by using organic fertilisers and always remove fallen fruit as soon as possible. 

Fruit fly control products do cost money, but if you don’t use them you will lose the fruit and be responsible for the spread of these pests into nearby gardens. Having seen the destruction first-hand, I am now hesitant to recommend that anyone rely on homemade traps/baits to control them, except for monitoring. If you are not willing or able to take appropriate care of your backyard fruit trees to prevent the spread of fruit flies, for goodness sake get rid of them altogether and replace them with non-fruiting trees or shrubs. Do it now.  

Friday, 12 July 2013

Best Ever Broccoli Soup


Though I don't spend a lot of time in the kitchen these days, I do enjoy the challenge of combining fresh, home-grown vegies from the garden with whatever is in the pantry and fridge. At the moment, broccoli is producing in abundance, both in my tank beds and Rodney's aquaponics system. We have eaten broccoli pasta, broccoli frittata and boiled broccoli as a side vegie. Today I decided to make broccoli soup for lunch. It is quite possibly the best soup I've ever made.

Also available from the garden were parsley, green capsicums and celery.

This is how I combined them with a few other ingredients to make this super soup.  

I tend not to use stock very often: homemade stock is very time-consuming to make, and I've already told you I don't spend a lot of time in the kitchen any more, and bought stock is horrendously high in salt, even the so-called salt-reduced varieties. However, this time I had a small amount, about half a cup, of very full-flavoured chicken stock (actually the cooking juices) leftover from a chicken dish we had a few days ago. Apart from this, the bulk of the liquid I used was milk, Zymil because of lactose problems. I'm sure soy or rice milk would be fine, and almond milk would add its own unique flavour for those who enjoy it. In fact, I nearly used it instead of Zymil.

1 tbsp olive oil
2 large heads of broccoli: separate the thick stalks from the top sections and chop them roughly,
break the heads into florets, keeping both parts separate
6 (smallish) stalks celery, sliced thinly: keep a few of the leafy tops and chop them roughly
1 large onion, chopped
3 garlic cloves, chopped
1 green capsicum, chopped
2 tbsp roughly chopped parsley
1 litre milk, your choice (plus a slosh or two extra if mixture is too thick)
2 potatoes, roughly chopped
1/2 cup strongly flavoured stock, optional
I did not add any salt and don't think it needed any, but add a teaspoon if you like, especially if you don't add any stock.

In a large saucepan put the oil, chopped broccoli stalks, celery, onion, garlic and capsicum. Stir-fry until just becoming tender. Add half the milk, bring to the boil and simmer, covered, for 10 minutes.

Add broccoli florets, potato and the remaining milk. Bring to the boil and simmer for 10 minutes. Add chopped parsley and celery tops and cook another 5 to 10 minutes. The potato should be tender and the broccoli beginning to fall apart.

When vegies are cooked, vitamise mixture to a thick slurry. This is when you might need to add extra milk and the stock, if using it. Taste soup and add salt if you need to.

Reheat before serving. Add a swish of plain yoghurt to each bowl, if you like.

This soup is hearty, healthy and tastes heavenly.


Saturday, 8 June 2013

Hibiscus Happiness


A lot of years ago I brought home four tiny rooted cuttings of tropical hibiscus from a garden expo. Knowing they would never survive in my area with its strong cold winds and frosty winters, I potted them and positioned them beside a north-facing stone wall.

Three of the four survived and grew, and grew, and grew. Luckily, each plant had different coloured flowers. There was a bright red, a hot pink and a pale blush pink. Every winter they died right back and I pruned the stalks to the ground. Each spring there would be masses of healthy new growth. New flowers appeared for months. They were over-the-top, flamboyant flowers that made me feel happy to look at them.

Every two or three years I repotted the plants into bigger pots. Eventually, they needed such large pots that I wouldn't have been able to handle a bigger one. So, I started separating the root mass each time I repotted, giving me dozens of new plants to give away.


At last, a few years ago, I decided I couln't face the task of repotting and separating the roots again. While they were in full flower, I put them in front of the house with a 'Free to Good Home' sign. Within minutes, they had been claimed by a new owner. I hope she continues to enjoy them as I did for many years. Sometimes I regret giving them away, but I'm happy they went to a true plant enthusiast.


Recently, we were on holidays in Mooloolaba and came across a display of tropical hibiscus in a shopping centre. The grower was happy for me to photograph his flowers, which he was obviously passionate about. I hope their joyful colours brighten your day.


My experience proved that you can grow these beauties in southern states (if you can obtain them) as long as you plant them in a suitable microclimate. In warm, frost-free zones they are easy to grow and very rewarding. If you have friends who grow them, they strike readily from stem cuttings.


Tuesday, 30 April 2013

Keeping The Critters Out

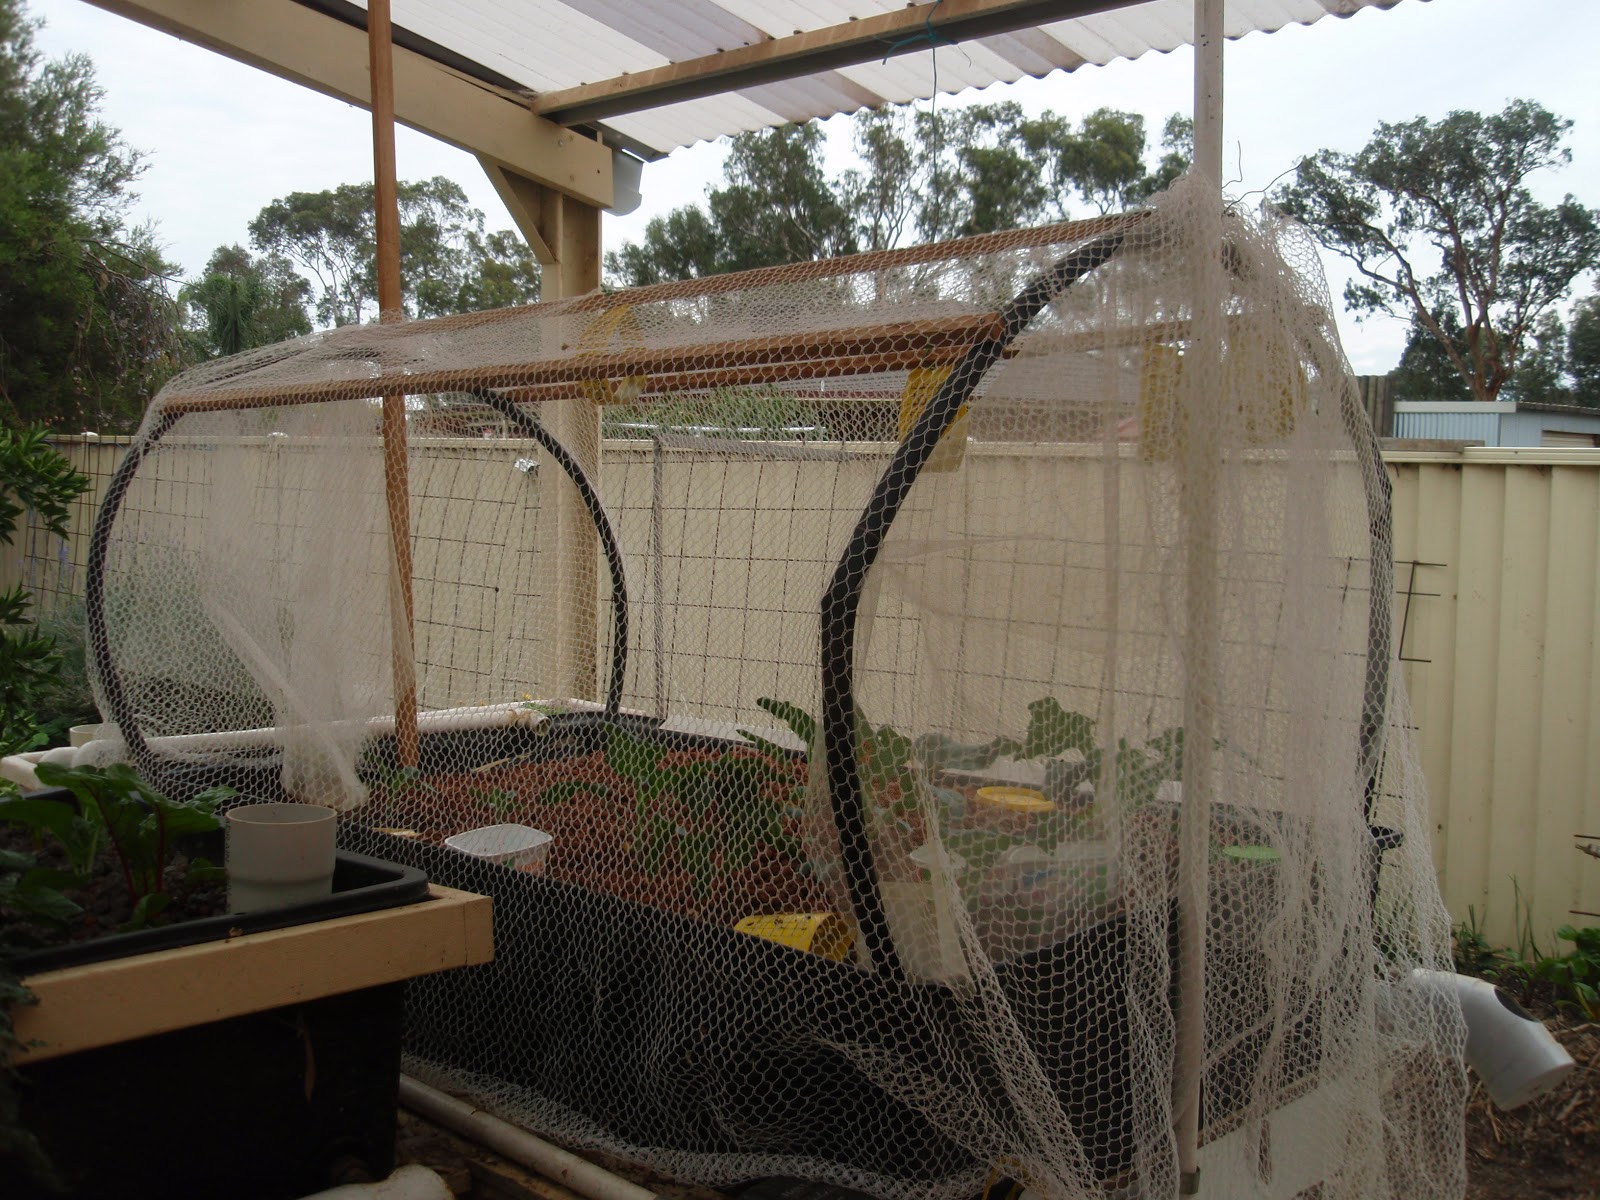
A stroll around my garden at the moment reveals a number of beds and individual plants with netting draped over them. It looks as if the plants are in prison, but it's all for their own good. The covers are keeping the critters from eating them or digging them up.


Cabbage white butterflies are a perennial problem. I usually wait until they have disappeared from the garden and try to get a crop of brassicas planted and harvested before they re-appear in spring. Sometimes this results in beds still being occupied by brassica crops when I'm ready to plant spring/summer crops, thus resulting in those crops being planted later than I would wish. I do place upside down bottles over individual seedlings, but then the seedlings can outgrow the bottles when there are still cabbage whites around. This year I decided to cover the beds with netting to keep the pests off my seedlings.


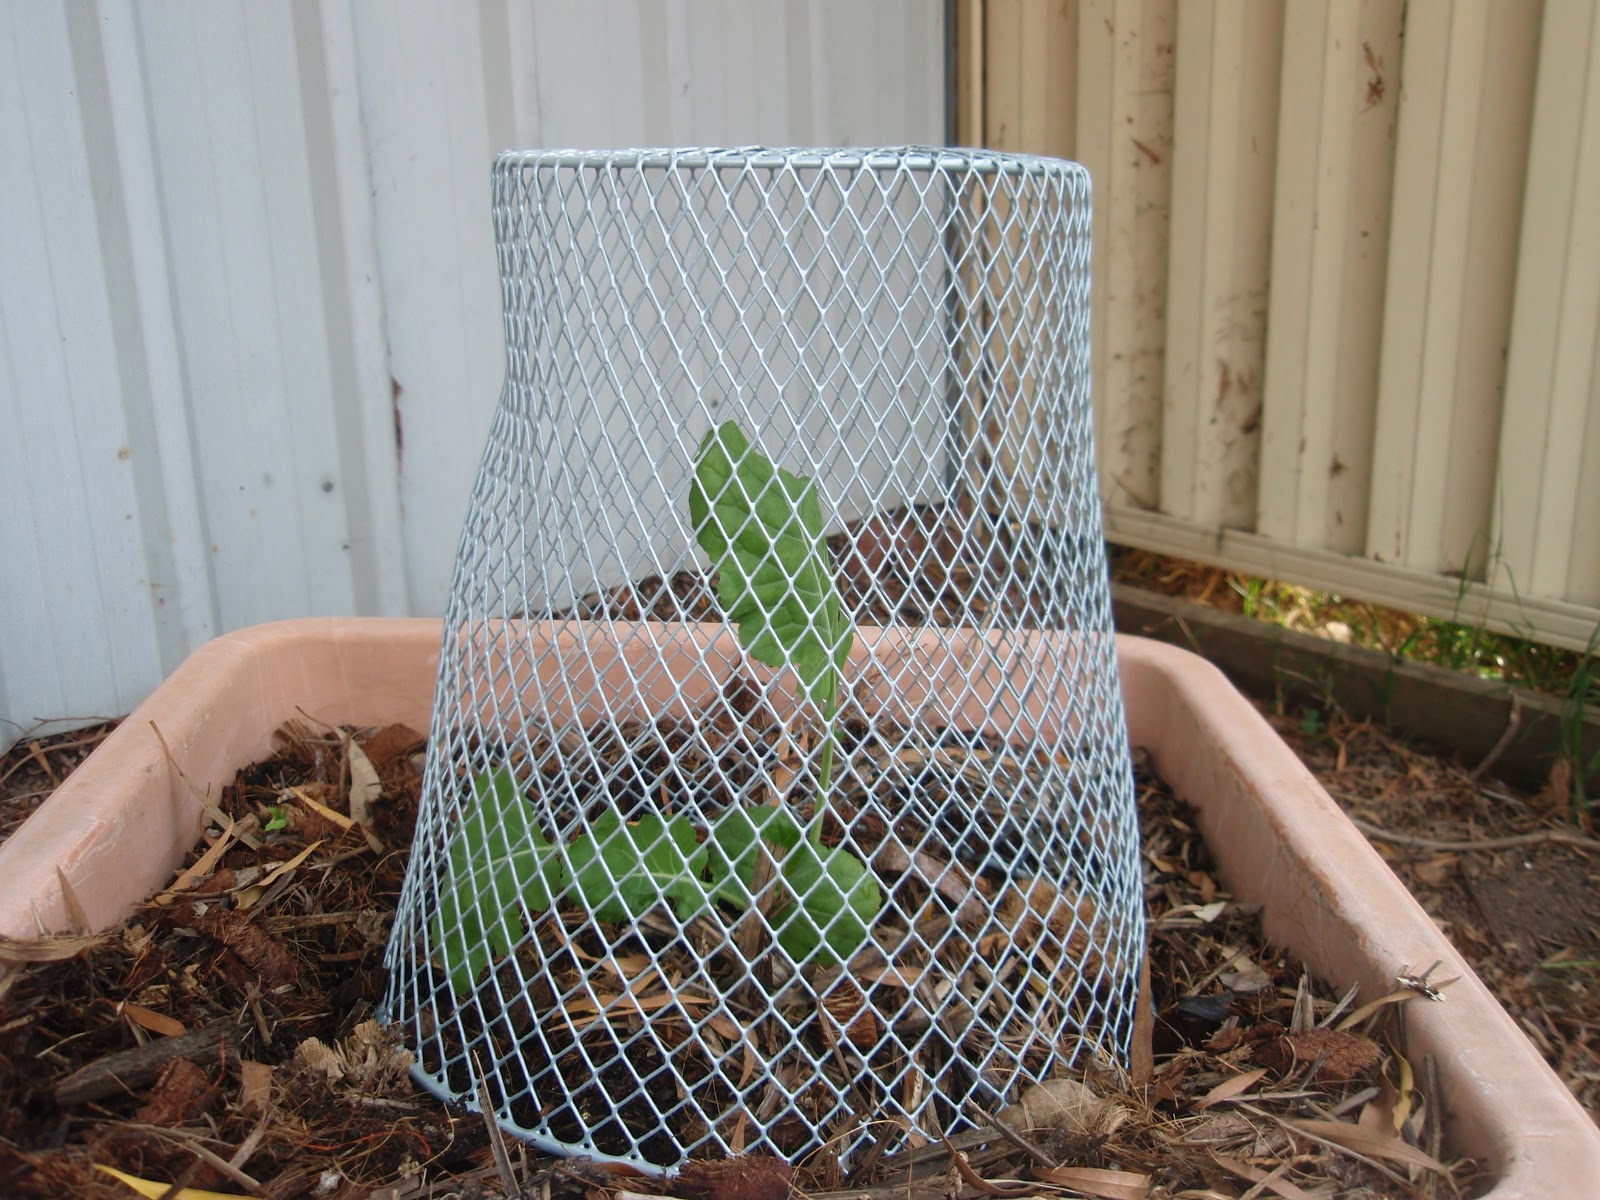
One lonely broccoli plant all by itself in a pot was outgrowing its protective bottle so I bought some cheap, wire, waste paper baskets from a discount store. Turned upside down, these make good plant protectors. By the time the broccoli has outgrown its basket, there should be no cabbage whites around for a while. At nearly $3 per basket, this might seem like an expensive way to get a bit of broccoli or a cabbage. Wouldn't it be cheaper just to buy it? In the short-term it would be, but I'm sure the baskets will last many years. Their use will also allow me to grow better-tasting and more nutritious food without chemicals, and to plant the varieties of my own choosing. So, I maintain that it's worth the small expense and taking a bit of trouble over.


In another tank bed I had transplanted some strawberry runners so that next season the crop will be easier to harvest and also easier to keep the blackbirds off. Until last year these birds were not really a problem, they would visit, scratch around for a while, and then move on. Now they seem to be permanent residents, scratching the mulch everywhere. They soon found the new strawberry bed with its lovely loose mulch. Even though there is no fruit, they have been having a good fossick, scratching out some plants and covering others in mulch. That bed too is now covered.


The vegie garden might look like some kind of plant prison, but it's me who will be eating that great food and not the free-loading critters.

Tuesday, 2 April 2013

The War-Time Garden


I thought I knew something about the 'Dig For Victory' campaign in England during the Second World War, and about the garden allotment system. Well, I did know it on an intellectual level. What it really meant on an immediate and personal level to the population is something I have just gained some small understanding of through reading a book called Your Garden In Wartime by C.H. Middleton.

Middleton had a gardening program on the radio in the 1940s and during the war many of his programs were about growing food as part of the war effort. Some of the talks were subsequently published as this book, re-released a couple of years ago. It is a charming, nostalgic, very, very British compilation of jobs to do throughout the year. It is bitter-sweet in many regards, really bringing home the deprivations suffered by all to a basic level of trying to ensure an adequate food supply. Some of the advice is now known to be very wrong (calcium cyanide as a fertiliser, for example) and most of it is relevant only to the northern hemisphere.

It is not a book to read for its advice, though there is enough still relevant, and relevant to us in the southern hemisphere, with a bit of juggling of times and measurements, to justify spending time reading it. To me, it is more of a historical record of the gardening ethos during those bleak years.

Basic produce such as potatoes and onions were in short supply as a lot of Britain's supply had come from Europe, even the seeds for many vegies were formerly produced in Europe. There is a great deal of detail about growing potatoes and onions and methods of sharing seeds. Middleton often cautions people against buying more seed than they can use as this will mean others do without.

He gives credit to seed suppliers and nurserymen. The first for continuing to be able to keep up supply of most seeds and for being able to still produce catalogues, despite the shortage of paper. The latter for their patriotism in uncomplainingly digging up their life's work, of rose growing for example, to turn their land  over to growing potatoes.

On the subject of potatoes, the author at one point says that Hitler and his U-boats can do their worst, we will be all right if we grow enough potatoes to keep ourselves fed. Winning the war with potatoes!

While encouraging people to turn most of their flower gardens into vegie gardens, he repeatedly says not to forego flowers altogether because of the cheerfulness they bring to our lives, which we all need in these dark times. He says that next summer, Hitler or no Hitler, he is going to be naughty and grow some sweet peas, because he missed them last year and is sure he is a better man for having a vase of sweet peas to enjoy. I know, it's totally corny, but still brought tears to my eyes to think of the death, destruction and deprivation suffered by so many when we take so much that is good in our own lives for granted.

The book is full of things that are 'jolly lucky' or 'grand', such old-fashioned words and sentiments you have to smile.


I think I have found out, at last, why there is so much advice around to thin tomato plants by picking out the young side shoots as they appear. In 40 years of gardening, I have never done this. Call me lazy if you will, but I've never seen the point when tomatoes produce so prolifically without removing side shoots. Also, the extra foliage can act as sun protection and prevent fruit from becoming burnt in our hot summers. I think I have read about someone (was it Clive Blazey from Diggers Seeds?) who did proper tests to determine the usefulness of this practice and found it to be unnecesary.

Anyway, in Britain, the climate is so unfriendly towards tomatoes that they have to do a lot of growing and fruit producing in a very short time. The removal of the side shoots allows the plants to put more energy into fruit production. I was astounded to read that tomatoes grown outdoors might produce only four nice trusses of fruit! I'm not sure I would put in all the effort he describes to end up with only four trusses of fruit per plant.  

This was meant to be a brief mention of what I found to be a very worthwhile read. I'm sure it will interest other gardening obsessives. My copy came from the library, but I think I'm going to have to buy one. It will be one of those books to return to again and again for its charm and nostalgia.     

Sunday, 31 March 2013

Accidentally Great Chutney


Yes, this is a gardening blog, but lots of my food comes from the garden and this recipe was particularly good so I'm going to share it. Nearly every year I make green tomato chutney from the last of the tomato crop. First comes my usual recipe, adapted many years ago from a Cordon Bleu recipe for a larger quantity.

2.7 kg green tomatoes, chopped
3 lge red capsicums, chopped
1 kg brown onions, peeled and chopped
1.4 kg Granny Smith apples, peeled and chopped
300 g sultanas
1.2 lt white wine vinegar
1 kg brown sugar
1 tsp dill seed
2 x 15 g pkts pickling spices
1/2 tsp ground paprika
1 lge root of ginger, removed at end
1 dsp salt

Combine all ingredients, bring to boil and cook until thick, 2 - 3 hours. Do not let it reach boiling point until all sugar has dissolved. Remove ginger root, decant hot mixture into hot sterilised jars and seal straight away.

Now here is what happened this year.

First, I went shopping without my list. However, I've made this recipe many times and thought I could remember everything. Many ingredients were already in the pantry anyway, and, of course, I had the tomatoes.

I used red onion instead of brown, just because I like them better. Anyone allergic to onions can substitute more capsicums and some zucchini and/or eggplant. As long as you keep the proportions of vegie:vinegar:sugar about right there should be no problem. As you can see, playing around with the ingredients, adapting to suit your own needs, can have unexpectedly good results.

I thought there was enough white wine vinegar in the pantry. There wasn't. Sure, there were two bottles, but both were less than half full, giving me 800 ml. There was a little apple cider vinegar, so in it went. Still not enough for 1.2 litres. In went some balsamic to make up the difference.

The brown sugar that was  in the pantry was only half a kg. In went some dark brown sugar to make up the quantity. It left a couple of tablespoons of dark brown sugar in the canister. That's no good for anything, might as well use it up. In it went.

I wasn't able to find the little packets of pickling spice in the supermarket, so decided to use a mixture of what was in the pantry. This turned out to be cardamom seeds, whole black peppercorns, cloves and ground allspice, about a tsp of each.

Instead of the ground paprika, I used two hot peppers from the garden, finely diced.

I'm pretty sure I completely forgot the salt.

Despite, or because of, all the changes, I think the finished chutney is the best ever.

Because I didn't have enough sterilised jars prepared, there was some mixture left over. This was stored in the fridge until I decided what to do with it. A couple of days later, I vitamised the mixture with enough apple juice to bring it to a thick pouring consistency (250 ml), boiled it up again for about 15 minutes then poured it into sterilised bottles. It is quite spicy and will make a great flavour addition to many winter meals as well as being used straight on meat dishes. 

Making chutney is a lot of work; this took four hours from set up to clean up, plus a little time later to make the sauce, but the result is worth it.


Sometimes I make summer relish with a variety of vegies from the garden, including zucchinis, eggplant and cucumber. One such recipe is in my book, Gardens For All Seasons. This relies on having the vegies ready to use at the same time, which does not always happen.


Friday, 22 March 2013

Ladybird, Ladybird, Fly Away From My Cucumbers


A couple of years ago a friend asked me to identify some mysterious yellow caterpillar-type creatures that were eating her cucumber leaves. Though I had never encountered them before, it did not take long to find out that they were the larvae of the 26-spotted ladybird.

It was apparently a very good year for this pest. After I had identified it for my friend, I discovered it in my own garden, then a number of other vegie growers in the area mentioned that it was in their gardens. I decided to break the pest ladybird's life cycle by squashing every one I saw and pulling up the cucumbers, their favourite snack (in my garden at least). I did wear my specs to make sure I was correctly identifying and only destroying the pest species and not any beneficial ladybirds.


Last year, I did not see any. This year, there were a few early in the season, which I quickly squashed. However, in the last week they have returned in large numbers. The giveaway sign is skeletonised leaves on cucumbers, canteloupes, pumpkins, zucchinis and potatoes. They might also feed on beans and tomatoes so be watchful for leaf skeletonising on all crops. Look on the backs of the leaves and you will see the grubs munching away, usually they are yellow, but sometimes can be a brownish ochre colour. There could also be clusters of yellowish eggs. The adult beetles feed on leaves too, but they are usually found on the tops of the leaves.

Pyrethrum sprayed directly onto the grubs will kill them. However, all I have done is squash any adults and larvae I've found and brush eggs off the leaves. At this stage of the season, in this area, the cucumbers and other curcubits have passed their best and are usually ready to come out of the ground; yesterday I pulled most of them out. The one zucchini that is still producing well was checked all over and had damaged leaves and pest inhabitants removed.

You can drop the pests into a jar with a little methylated spirits in the bottom if you are averse to squashing.

Most ladybirds are friends in the garden. Some eat small pests such as aphids, mealybugs and spider mites, others browse on powdery mildew that might be on plant leaves. Do not make the mistake of thinking that all ladybirds are benign or beneficial. If you are in any doubt, catch one and count the spots, then get rid of the pest species before they get rid of your crops. The 28-spotted ladybird is a different species from the 26-spotted, but is also a garden pest.

This website is a useful guide to ladybird identification: http://www.brisbaneinsects.com/brisbane_ladybirds/LadybirdFieldGuide.html